Pointing your own domain name to your Windows Azure Web Site is fairly simple and fast, if you know how to. A place where people go wrong or find it difficult is regarding setting up DNS. I’ll try to narrow it down.
Start by logging into Windows Azure portal and head to your website. If you are running a free website, you’ll have to first scale it to either a shared or standard plan. Do this by clicking “Scale” on the top menu, and choose your desired plan.
Now go to the “Configure” tab and press “manage domains”
This popup will tell you instructions how to do, but these can be a bit tricky to understand. What is says, is Windows Azure needs to verify you are the domain name owner of your desired domain. This can be done by adding a CNAME-record to your DNS called awverify.domain.com
Furthermore we will have to point our A-record to the IP address stated in the popup if we want domain.com to redirect to our Windows Azure website. I’m not interested in that to start with. Instead I want azure.egeek.dk to point to my Windows Azure website, where as egeek.dk points to my own webserver.
Let’s head over to our DNS configuration. I’m using GratisDNS, but it doesn’t matter which you use. Configuration can look a bit different depending on your DNS host, but settings are the same.
Because I don’t want egeek.dk to point to Azure but my own server, I have given my servers IP as a-record. If you want domain.com to point to Azure, simply create a a-record with the IP address stated in the popup I mentioned previously.
As for the CNAME, it is here we have to make a record, so Windows Azure can verify we are the domain owners. Secondly, it’s also here I create my subdomain pointing to Windows Azure.
As you can see, I have created awverify.egeek.dk to point to egeek.azurewebsites.net – this is needed to make it possible for Windows Azure to verify I own the domain egeek.dk.
Secondly I have created azure.egeek.dk and pointed it to egeek.azurewebsites.net, making it possible to hit my Windows Azure website, when going to azure.egeek.dk.
That’s it. Keep in mind that DNS servers have to update before Windows Azure portal can register changes. Usually it takes a few minutes, but can take up to hours. If Windows Azure can not verify your domain within an hour, possibilities are, that you most likely did something wrong.
To check if DNS settings have passed through, we can bring up Command Line or Terminal.
1. “nslookup”
2. azure.egeek.dk
This will give us the output:
This tells us the IP address and hostname the domain is pointing at. Keep in mind this is the DNS we are connected through. DNS servers has to transfer data to each other, so either ours or Windows Azure’s DNS might not have gotten the changed yet.
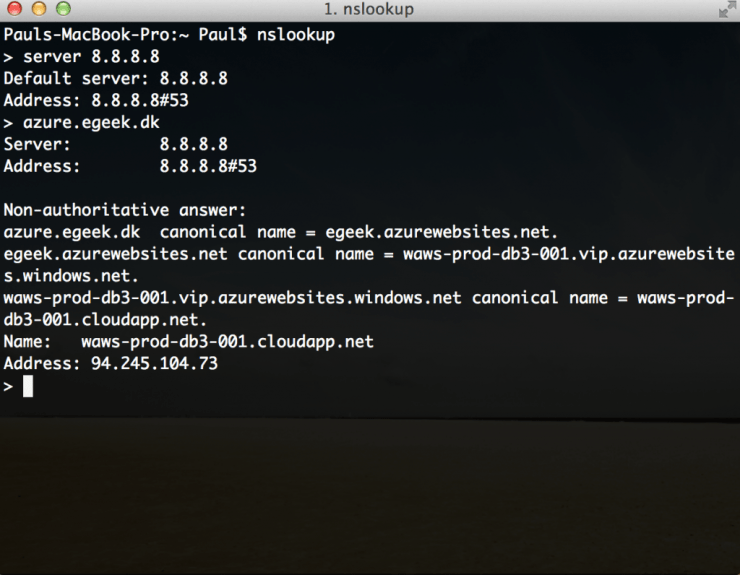
You can test other DNS servers, eg. Google’s DNS, by typing “server 8.8.8.8” followed by “azure.egeek.dk”
As you can see, we are now using the DNS 8.8.8.8 (Google), and both DNS servers receive the same data.
Lets head back to Windows Azure portal > Web Sites > our website > Configure > manage domains
Type in your domain or subdomain, in my case azure.egeek.dk and click the accept button.
If Windows Azure has registered DNS changes, you should now be able to point the domain / subdomain to your Windows Azure website.
Want to know more about setting up DNS records to point at Windows Azure, watch this Azure Friday video with Scott Hanselman and Stefan Schackow.


